Well it has been a couple of weeks, I had my Carpel Tunnel surgery on May 12th. I just got the cast off on May 23rd and I have to say my hand is still pretty weak. Now it has been a long 2 week because if you remember we had HSN's 24 hour craft event on May 8th and I received all my goodies while in the cast, so I to put it aside until cast came off ( was driving me CraZy ). Below is just some of the items that I ordered from HSN.


Any Questions please let me know and as always Happy Crafting!

Well I have finished my 1st card since the surgery and if I do say so myself it was worth the wait, and I have come to know that you are only as good as the products that you work with. From the HSN crafting event one of the items I purchased was the Crafter's Companion 3D Embossing Folders Set with Stamps, Cards and Rock-a-Blocks 542-657 Bundle for a great price. This is what I used for my card.
 |
| Crafters Companion Luxury Card Stock |
 |
| Gemini Die Cutting and Embossing Machine I have to say if you do not have this machine it is the best. HSN always sells out so the next time they have a crafting event make sure you pick this up. |
 |
| Crafters Companion 3D Embossing Folder Bundle I used the Regency Swirls 3D embossing folder this has so much depth to it. Amazing |
 | ||||||||||||||||
| Staples-15141-Trimmer Sheet-Capacity It is a little had to see in this picture because of the shine on the Card stock but I put a curvy edge on this, looks great. |
 |
| Staples-15141-Trimmer Sheet-Capacity I did the inside of the card with white card stock for writing messages. |
 |
| Staples-15141-Trimmer Sheet-Capacity I used Dark blue for the Card stock. |


 |
| Crafter Companion 3D embossing Folder Bundle This Stamp came in the bundle with the embossing folders. |

 |
| Crafter Companion 3D embossing Folder Bundle This is the complete Stamps sets you will receive. ( Great Deal ) |
 |
| I had a little Love Dove in my stash that I used, not sure when I got this. I did color with a clear Crafter Compaions Sparker Markers |
 |
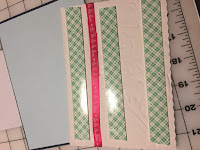
| I used a love red ribbon that i picked up on clearance at a craft store. |


Comments
Post a Comment